I’m guessing that when you buy a new sled, you perform a few basic adjustments and make a few custom touches.
Here are some basic adjustments and modifications I make to my sled prior to the start of the riding season.
After you read this, I’d like to know what YOU do.
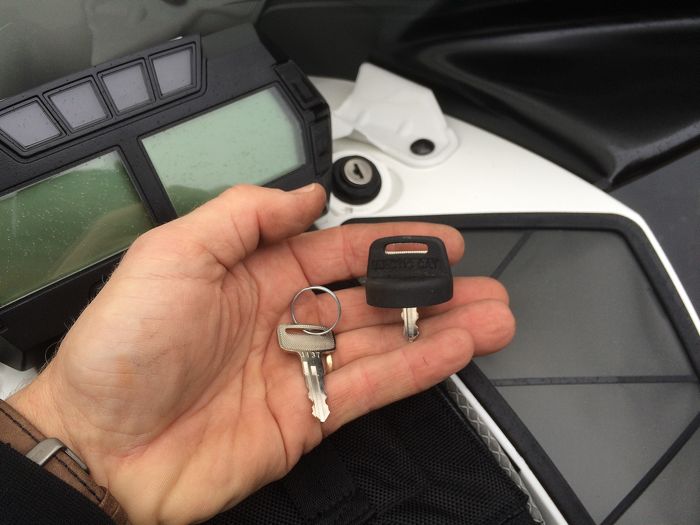
First thing to do before even THINKING about going for ride — including that tempting lap around the yard — is to remove the spare key from the chain and put it somewhere safe (and that you’ll likely forget about).
If you don’t do this, Mike F. will call you out on it publicly in the comments section of a website (thanks Mike).
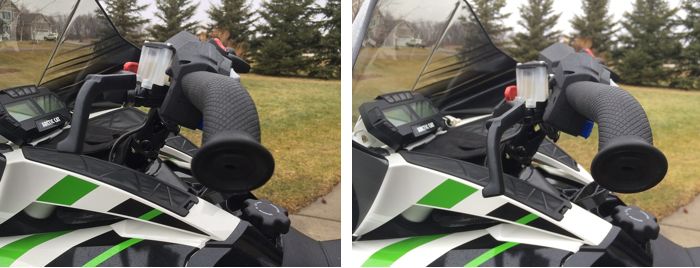
Sleds come with the brake levers positioned too far up for my tastes (left), so a few minutes with the tool-kit-supplied Torx wrench and I’m ready for my patented stand-up style of riding.
Repeat a similar procedure for the handlebar riser and bar rotation.
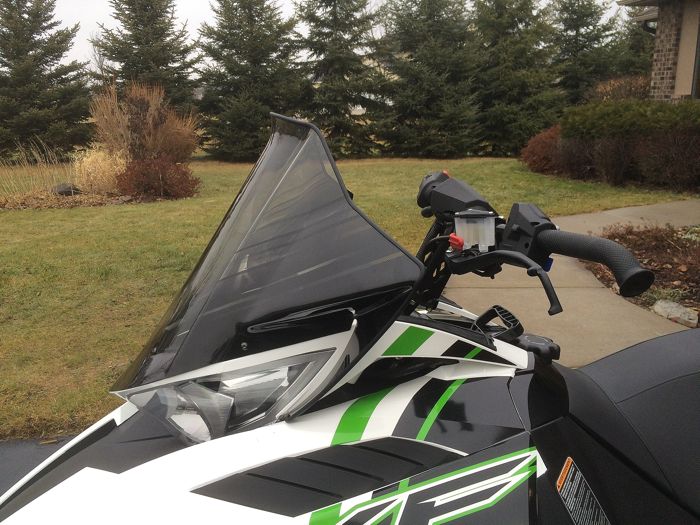
Some people call the piece of hood-mounted plastic that comes stock on Sno Pro, Limited and RR models a “windshield.” I call it a prescription for frostbite, and swap it out with a window featuring adequate wind protection like the LXR one (P/N 6606-377) above.
Note: I normally run the even more protective Mid-heigth 14-in. window. We’ll see if I switch back to it once I get a few decent rides it.
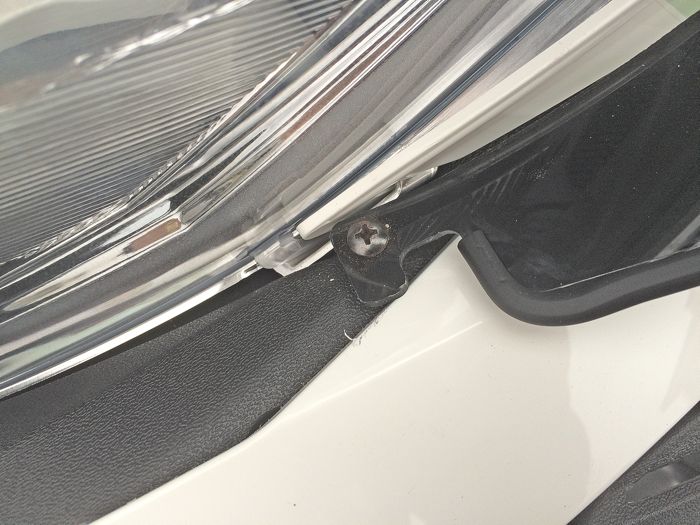
Here’s a nice tip I learned from Team Arctic’s Wes Selby when installing windows that have the cut-out side tab mount. The instructions for mounting this window confuse me a bit and don’t leave me fully confident that the side tab is actually doing anything.
Selby fixes it by simply using a screw to affix the side tab to the plastic cowl. Problem solved!
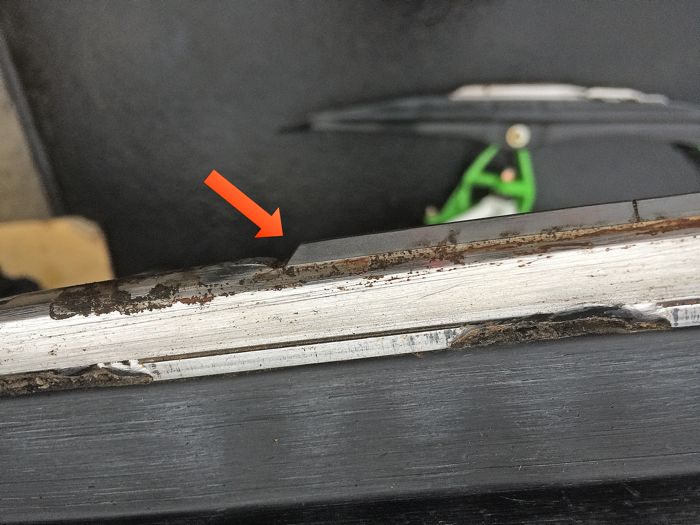
The various asphalt and concrete pads on my property wear too many scars from gouges caused by the sharp leading (and trailing) edges of brand-new carbides. D’oh!
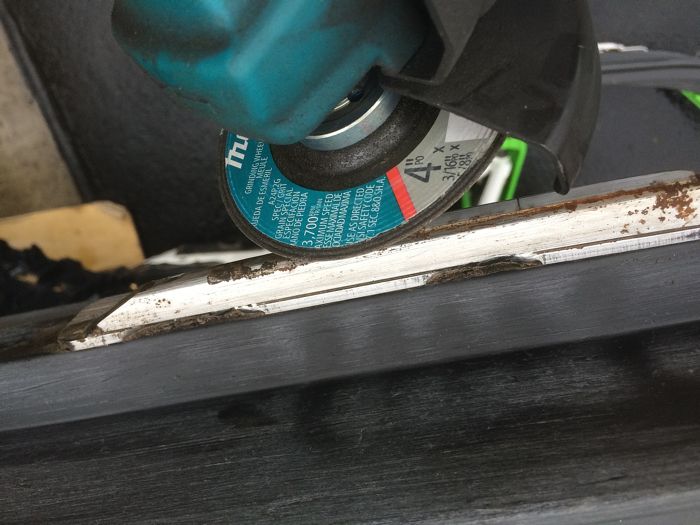
In an effort to not add to the collection, I’ve been grinding smooth both the leading and trailing edges.
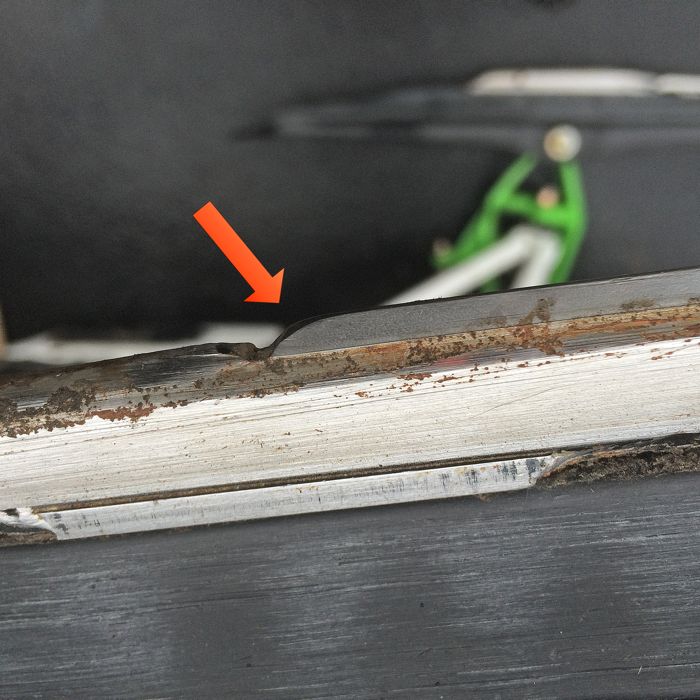
That’s more like it!
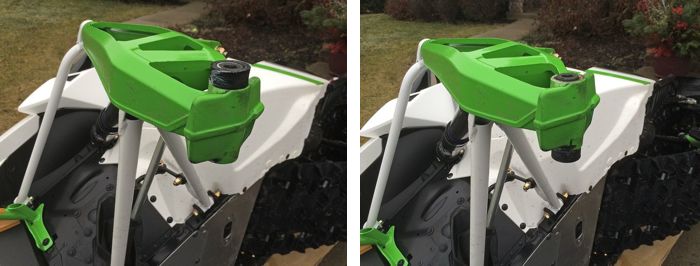
Depending upon how your dealer installs the skis on a new sled, your machine could be on either a narrow or wide setting. As a wiley old trail carver who can use the extra 2 in. of ski stance, I prefer my set up on the wide side.
Switching it out is easy. Just remove the ski, flip the plastic spacer on the bottom of the spindle to the desired side (see above).
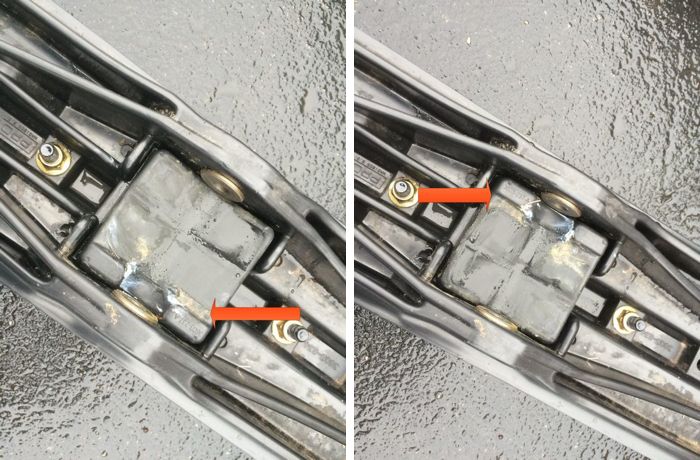
Then flip the rubber ski/spindle pad 180 degrees (see above) and reinstall the ski.
Repeat the procedure on the other side and you’re set.
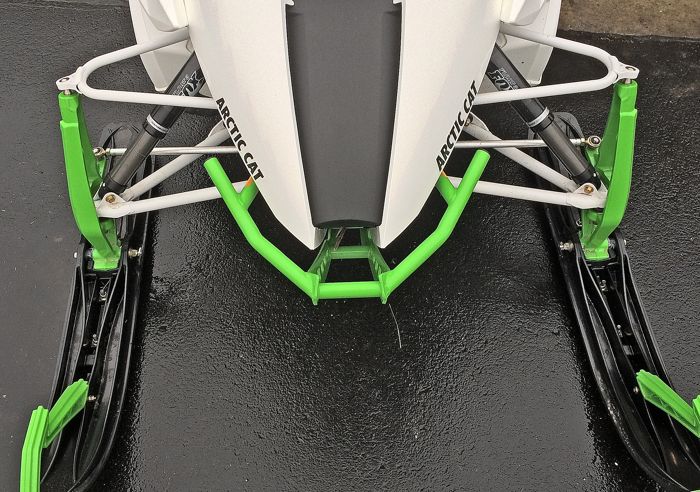
Now my sled is at full ski stance width and I’m ready to do my best P.J. Wanderscheid around the corners.
I’m a fan of the handy little goggle bag that’s available for ProCross/ProClimb chassis that attaches between the gauge and handlebar post.
I use the bag for maps and for holding my cell phone/camera.
I’m constantly battling keeping my phone warm enough to stay operational, but a trick I learned last year fixed the problem.
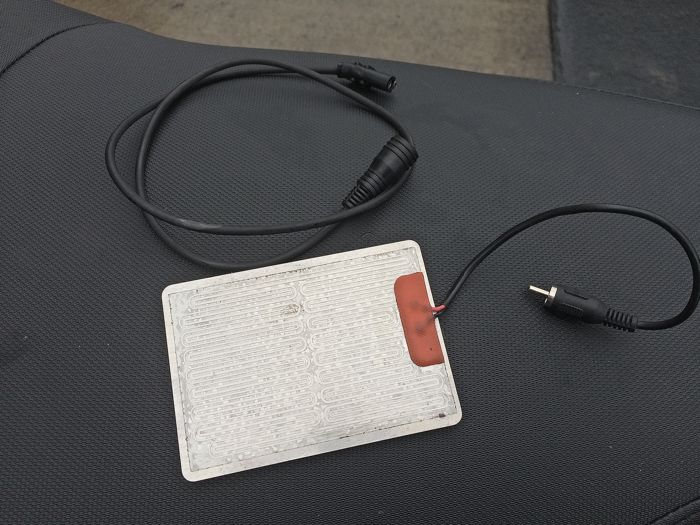
It starts with the accessory Bag Heater Kit from Cat (above), which I place inside of a similarly sized felt bag and put into the goggle bag.
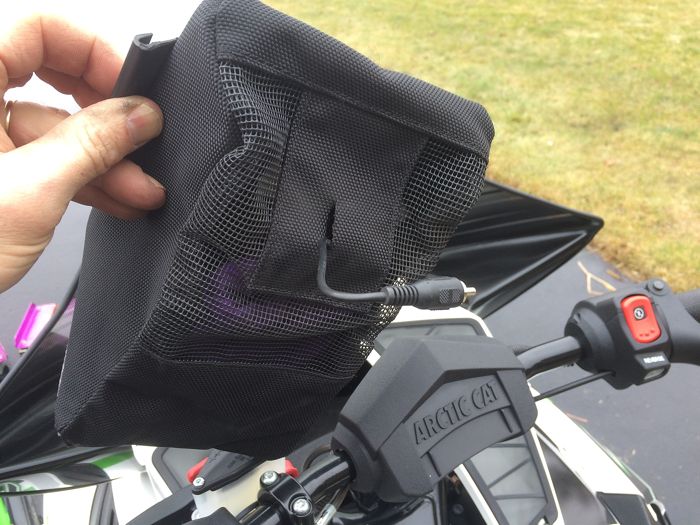
I cut a small hole on the bottom of the bag for the element’s cord…
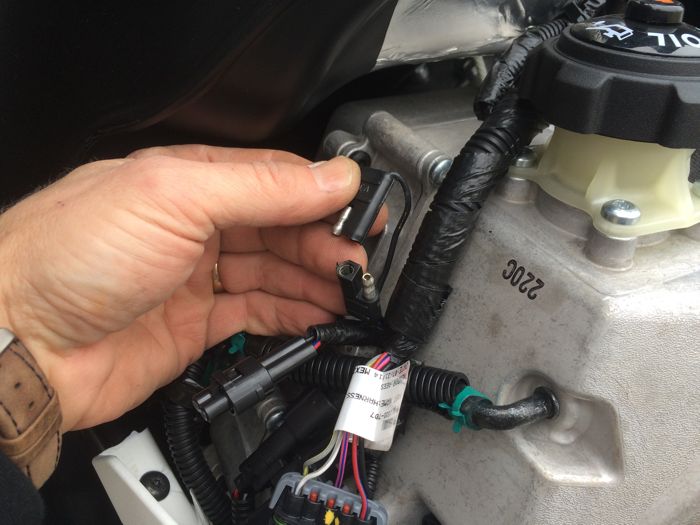
…then splice the separate cable into the sled’s accessory outlet located next to the chaincase.
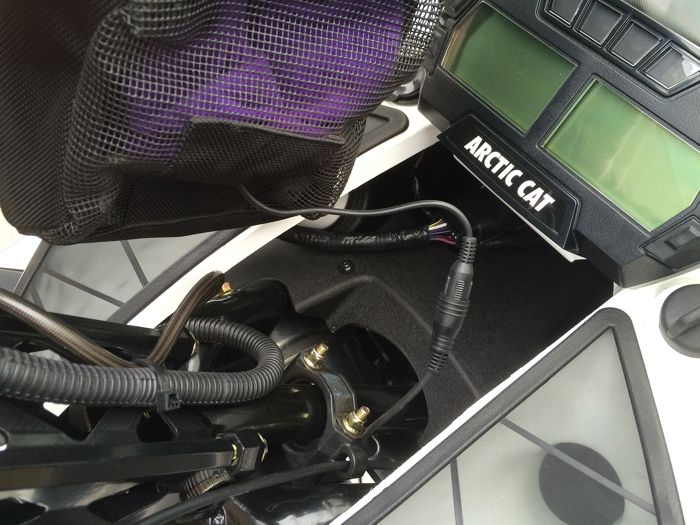
Connected!
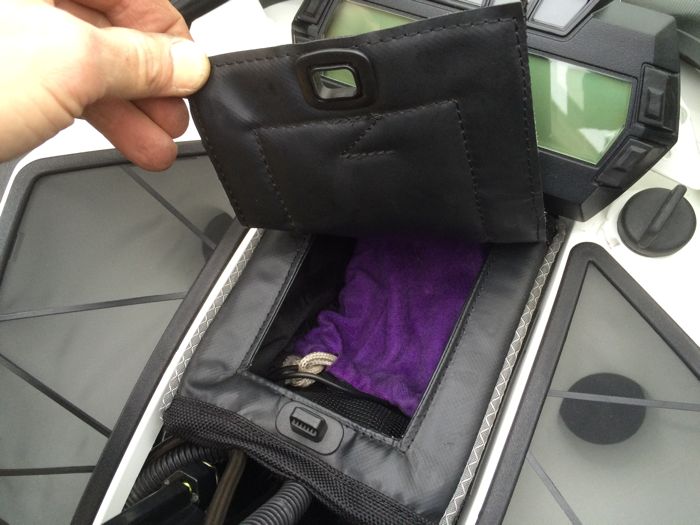
The element stays warm for as long as the engine is running, keeping my phone operational and ready to capture pix of my friends doing goofball maneuvers.
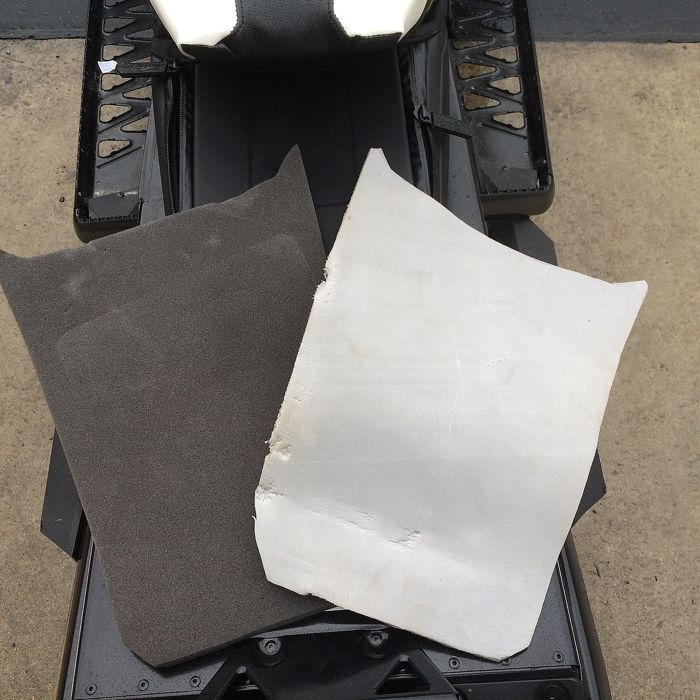
The Mid Tunnel Bag is another carryall that I’m particularly fond of, but it too needs a little modification to suit my ditch-banging style.
Specifically, I like to add some additional high-density foam to the bottom of the bag, so the items that I store in it don’t get pounded into oblivion during may stutter bump rage sessions.
I got the foam at a fabric store a few years ago, cutting it out into the same shape as the stock foam.
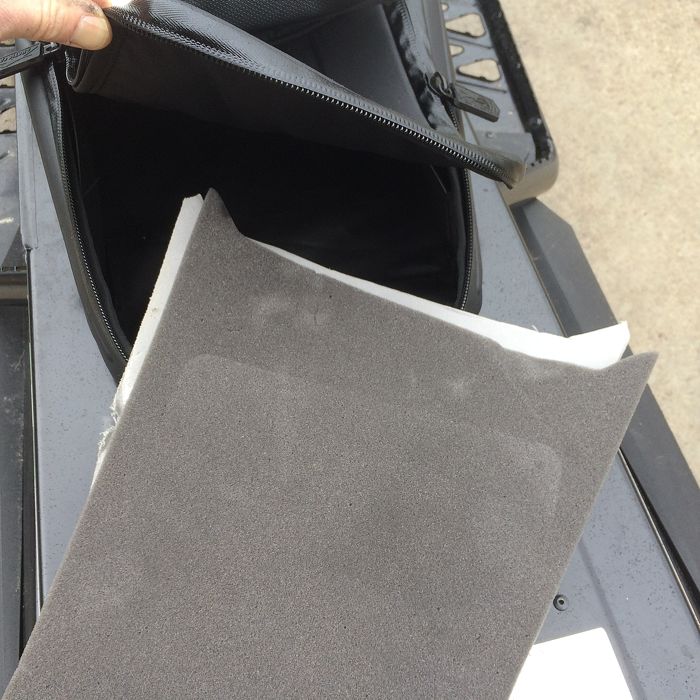
I put BOTH pieces back into the bag.
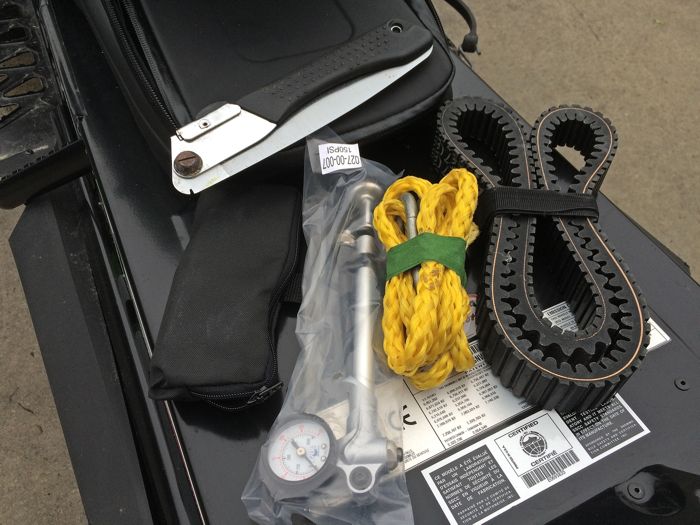
Then it’s ready to pack the extra stuff I bring along, such as the tool kit, shock pump, tow strap, spare belt, folding saw and the last remaining piece of my 15-year old wedding cake.
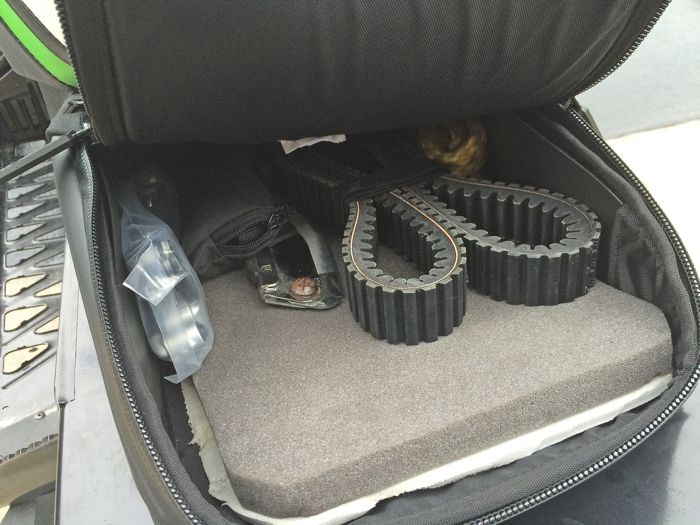
What’s not in this picture (but is also placed in the bag) are a few rags and another tool kit featuring a bunch of seldom used (but thankfully available) items that can be used for everything from a trailside A-arm fix to a complete engine rebuild.
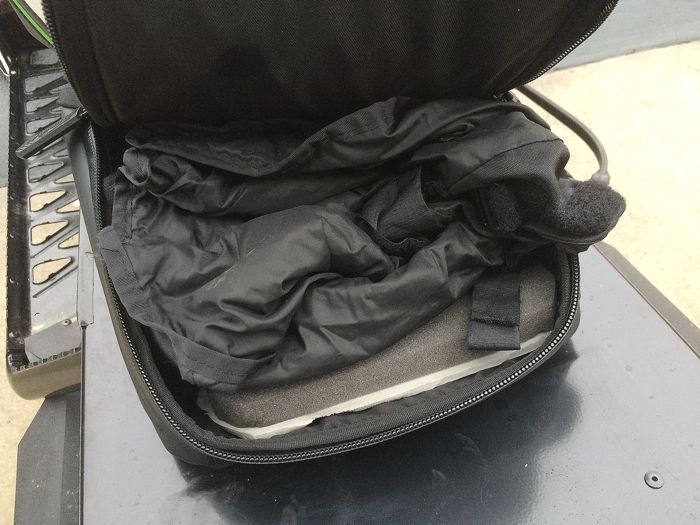
Last but certainly not least, I add my favorite, indispensable soft muffs for those times when my girly-man hands need extra warmth.
So that’s my pre-first-ride to-do list. What’s yours?


John, I only kid because I care….:) I learned that lesson myself the hard way 30 years ago, and it kinda stuck with me!
I always carry a roll of TP in my bag.
-signal mirror
-fire starter (dryer lint covered in candle wax)
-water/wind proof matches
-chicken wire
-spare light bulb for headlight
Hey John, Set up similar to yours. I would add – 8inch Woodys carbides- 135 studs- curved brake lever- handgaurds with extensions- cross country windscreen, with drilling 2 extra holes for front mounting to cowling. add an extra wheel kit at front of skid. Wider ski stance – tunnel bag with bubble wrap – flashlight and rags – muffs are a good idea when it gets real cold- Unload suspension, check pressures in air shocks – I like 75 psi – If you have Evols, don’t forget you have 4 settings per shock. Evol and main chamber pressures. Rebound and compression clickers, front seat, and then count number of clicks out. same on both sides. Use the high pressure pump for Evol shocks, comes with sled.
Great check list John…I will share several items I carry, some of which will help in the mountains out west.
Shovel with built in saw blade, zippo lighter and hand warmers.
Compass. Storm rolls in, you loose sight of the sun, compass helps get you home.
Tampon, yes a tampon. If you need to start a fire, dip the tampon in your fuel cell for a minute and ignite. The tampon will burn a long time and help build that fire !
First Aid kit and Emergency blanket. Spare gloves, extra googles with yellow lens ( For sudden white out conditions ) Siphon Hose to “borrow” fuel from your buddy to make it home.
A leatherman multi tool. Your buds will start calling you MacGyver !
I know I’m missing some items….
Mechanical sled pre-checks:
Loosen that track ! OEM’s set track tension too tight. Also check and adjust track alignment (left to right)
Clutching: Check belt deflection and change primary weights per your riding elevation. So much performance is left on the table with improper clutch set-ups.
In the mountains, each rider needs to carry avalanche probes, a “spot me” beacon and extra fuel.
Be safe and prepared for the worst! I have used most all of the listed items at least once in dire situations.
All great suggestions you guys. Keep them coming…
I have almost the exact set up as yours… I don’t use hand muffs but, I should get a pair of them… I throw in a partial roll of duct tape. Fold in half saw. Multi tool. Small first aid kit. Another bonus of the 4 stroker in the Procross… The goggle bag stays heated from the heat of the motor. Cell phone charger plugged into the 12v outlet to keep my cell phone charged. Go through the sled from ski-tip to snow flap, change fluids, grease chassis, replace bearings, clean clutches and check belt deflection. New set of NGK’s. If, it’s a new sled to the stable… Anodize the rear skid rails black. And with low snow seasons like this one…. POLISH, POLISH, POLISH…
Simple setup for me really..
-take it completely apart, losing fasteners along the way..
-New wrap
-New go fast Speedwerx parts
-New Elka stage 5’s
-Some handmade goodies
-Spare belt, tools, and the Patented Arctic Insider a-arm repair kit, some gorilla tape and a small basic first aid kit (for trailside surgery)
Then putting it together wondering where I put the tools I took it apart with and somehow ending up with more fasteners then I started with (even after losing some)
I could be factory with this intense amount of finesse and precision.
a lot of good suggestions. A tip on widening the ski stance. Get new cotter pins before you do it to save a trip to the store. When reusing the stock ones will break a leg off when rebending them. Changing the stance leverages the sway bar and shocks softer which changes camber if not adjusted with a pound or two of air in the shocks. With more positive steering might want to tweak the toe for smooth groom trail riding too
John, where do you keep the sardines and candy smokes?
X2 ON THE T.P. I’VE BEEN KNOWN TO EXTORT UP TO A BUCK A SHEET FROM MY RIDING BUDS, ESPECIALLY AT CRITICAL TIMES!!!! HELPS TO PAY FOR MY MOD SLED PARTS!!!
John, if you twist that tab on the windshield 90 degrees it locks perfect into place in the headlight clip. What’s your new limited and xf6000? Cheers.
On my 12 F800 LXR I added Tunnel flares, the BIG window, Tether, Bergstrom triple points with ski savers & shims, extra wheel kit on the skid to improve the hyfax wear, soft muffs when needed, add an LED flashlight, duct tape, several large cable ties, tow rope and rag to the tool kit.
Something that has yet to me mentioned is a means to record set-ups. Beginning with my 2004 F SP and now with my 2013 RR I found myself not remembering the intricacies of the machine machine following a ride to adjust when I had time. I started with a steno pad and pen and now have a spreadsheet that I work off of to monitor the machine. People will look at you funny when to pull in to a rest stop or a restaurant… and take notes, but it has helped me immensely, especially with the RR.
Beyond on the “nerd journal” as it is called by my riding group I am a fan of the ROX adjustable riser (the 12-16″, for optimal doofuss appeal), adjustable clutch weights (STM, to make you have to take more notes than before), a bottle of HEAT and a magnet.
For guys having problem with fasteners. Id also like to give an endorsement to a product called a NordLoc washer. No its not a lock washer (does not technically exist). It also is reusable, a lock not (again, does not technically exist) or nylon insert nut. They are literally the best means next to a rivet to prevent fastners backing out due to vibration (rivet, self piercing being the best). I am used these in my skids for years after spending a fair amount of time with them in other applications. They can be bought through McMaster Carr.
On the 4 strokes I wire in the battery tender plug in and carry booster cables in the tunnel bag ..
I love this! It’s good to know that there are Christian fitness gurus in the world who altaucly believe in free weights! I’ve seen way too many personal trainers that work with me encourage their clients to use the machines. I find it to be quite sad that machines have become so popular, although I can agree with you on the cable machine. Replacing machine workouts and utilizing free weights is the best option for a better workout! I personally feel that the burn is more intense when using free weights, which is exactly what I want my clients to shoot for! That’s what gets real results. Really liking the website!! http://jyiqfkkmuqg.com [url=http://rimcnt.com]rimcnt[/url] [link=http://dbyypownk.com]dbyypownk[/link]
1. Install a high windshield
2. Mount a GPS on the mountain strap.
3. Attach belt clips on the tunnel for a spare drive belt.
4. Swap the stock seat for a mountain seat.
5. Attach a mountain gear bag.
6. Snap on a handlebar bag.
7. Let some air out of all the shocks.
8. Put a tool kit and tow rope in the battery box area under the seat.
9. Rotate the throttle lever rearward and downward.
10. Rotate the brake lever forward and downward.